Follow Me On Social Media!


Espresso Chocolate Cheesecake: Rich, Creamy & Coffee-Infused Dessert

So, you’re in the mood for something decadent that’ll make your taste buds do a happy dance? Well, get ready to become the hero of your next dinner party (or solo Netflix marathon—no judgment here). This espresso chocolate cheesecake is about to change your dessert game forever. And if you’re thinking, “But I can barely make toast without setting off the smoke alarm”—relax! I’ve got your back.
Table of Contents
Why This Recipe is Awesome
Let me count the ways this coffee chocolate cheesecake will rock your world:
1. It’s basically foolproof (I tested it three times after a glass of wine, and it still turned out amazing)
2. The combo of chocolate and espresso creates this mind-blowing flavor explosion that’ll make your friends think you’ve been secretly training at Le Cordon Bleu
3. The “oohs” and “aahs” you’ll get when serving this are seriously addictive
4. It looks way more complicated than it actually is (your little secret!)
5. You can make it ahead of time, which means less day-of stress and more time for you to perfect your “Oh this? I just threw it together” humble brag
Ingredients You’ll Need
For the crust:
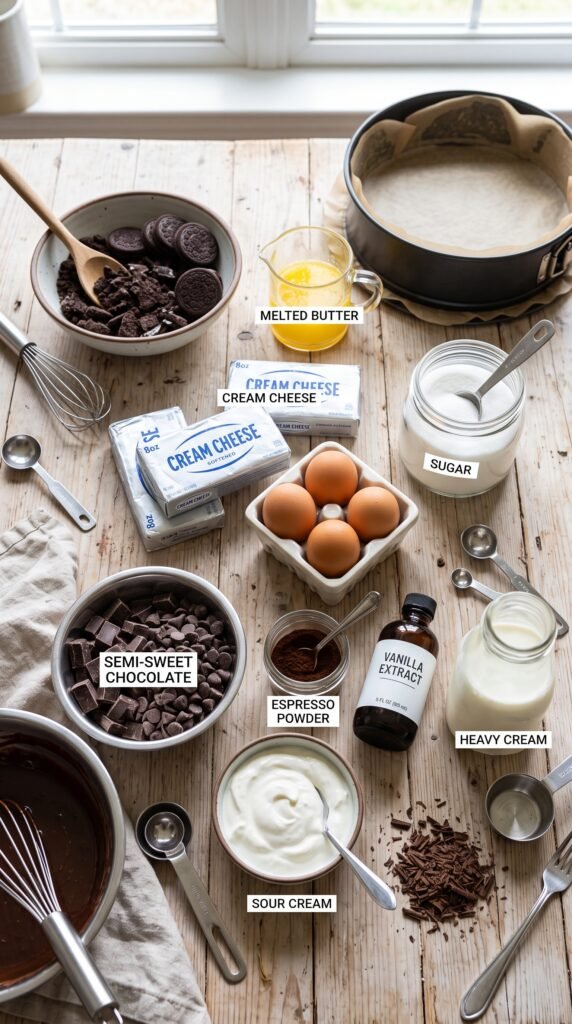
- 1½ cups chocolate cookie crumbs (Oreos with filling removed work great, but who has time for that? Just crush ’em whole!)
- 5 tablespoons butter, melted (the real stuff, please—this is no time for diet substitutes)
- 3 tablespoons sugar (because the cookies clearly don’t have enough)
For the filling:
- 24 oz cream cheese, room temperature (cold cream cheese = lumpy disaster)
- 1 cup sugar (it’s dessert, embrace it)
- 3 large eggs (medium eggs need not apply)
- 8 oz semi-sweet chocolate, melted (the good stuff, not those weird chocolate-flavored chips)
- 2 tablespoons instant espresso powder (the secret weapon!)
- 1 tablespoon vanilla extract (real vanilla, not that fake stuff that tastes like sunscreen)
- ½ cup sour cream (full-fat—we’re not playing around here)
For topping:
- 1 cup heavy cream (again, this is not the time for “light” anything)
- 2 tablespoons sugar
- Chocolate shavings (because we’re fancy like that)
Step-by-Step Instructions
1. Preheat your oven to 325°F (165°C). If you skip this step, just throw away your kitchen now.
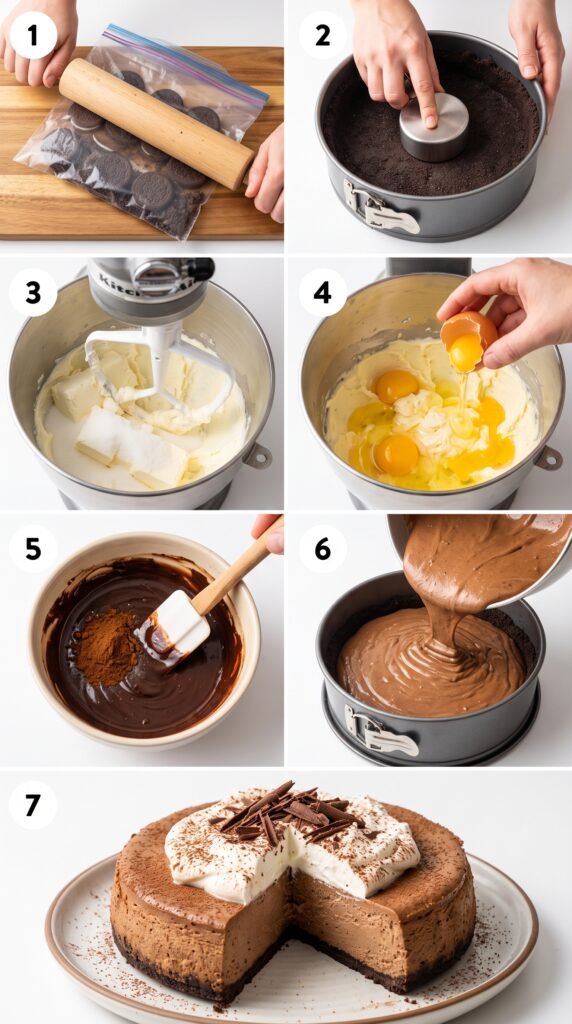
2. Make the crust by mixing cookie crumbs, melted butter, and sugar in a bowl until it resembles wet sand. Press this mixture firmly into the bottom of a 9-inch springform pan. Use the bottom of a measuring cup to really pack it down (bonus: this doubles as stress relief).
3. Bake the crust for about 10 minutes, then let it cool while you deal with the filling. Don’t skip this pre-bake—soggy bottoms are only entertaining on baking shows, not in real life.
4. Beat the cream cheese and sugar until smooth and fluffy. If you have lumps, you didn’t let the cream cheese soften enough. I told you! Room temperature means ROOM TEMPERATURE.
5. Add eggs one at a time, beating well after each addition. This is not the time to show off your multitasking skills.
6. Dissolve the espresso powder in 1 tablespoon of hot water, then stir into the melted chocolate. This is where the magic happens, people!
7. Mix the chocolate-espresso blend into your cream cheese mixture along with the vanilla and sour cream. Beat until just combined—don’t go crazy or you’ll add too much air.
8. Pour the filling over your crust and smooth the top. Tap the pan gently on the counter a few times to release any air bubbles (like the ones in your stress level right now).
9. Bake for 50-60 minutes until the center is almost set but still a bit jiggly. Think Jell-O, not earthquake.
10. Let cool in the oven with the door cracked for an hour, then at room temperature for another hour, and finally refrigerate for at least 4 hours (preferably overnight). Patience is a virtue, especially with cheesecake.
Common Mistakes to Avoid
- Opening the oven door during baking — Unless you want a Grand Canyon-sized crack in your cheesecake, keep that door shut!
- Skipping the water bath — If you’re prone to cracks, place your wrapped springform pan in a larger pan filled with 1 inch of hot water. It’s like a spa day for your cheesecake.
- Over-mixing the batter — This isn’t a protein shake. Mix until just combined or you’ll trap air that causes cracks.
- Cutting with a dry knife — Run your knife under hot water and wipe between slices for Instagram-worthy perfection.
- Rushing the cooling process — I know it’s hard to wait, but cheesecake has trust issues and needs time.
Alternatives & Substitutions
- Not a coffee fan? (Who are you even?) Swap the espresso for 2 teaspoons of orange zest for a chocolate-orange version.
- Need it boozy? Add 2 tablespoons of Kahlúa or Bailey’s. I won’t tell anyone.
- Gluten-free friend coming over? Use gluten-free cookies for the crust. The filling is already naturally gluten-free (you’re welcome).
- Lazy option? Use a pre-made chocolate crust. Sometimes shortcuts are self-care.
FAQ (Frequently Asked Questions)
Can I freeze this cheesecake?
Absolutely! Wrap it well and freeze for up to 2 months. Your future self will thank you during that 10 PM dessert craving.
How do I know when it’s done?
The center should still have a slight jiggle—think Jell-O, not liquid. The edges should be slightly puffed and more set than the center.
My cheesecake cracked! Is it ruined?
Nope! That’s what the topping is for. Cover those imperfections with whipped cream and chocolate shavings, and no one will ever know. Concealer, but for desserts.
Can I make this without a springform pan?
Technically yes, but getting it out will be like performing surgery. If you must, line a regular cake pan with parchment paper with overhang to lift it out.
How long will it keep?
About 5 days in the refrigerator, but who are we kidding? It won’t last that long.
Final Thoughts
There you have it—a showstopping dessert that requires minimal skill but delivers maximum praise. The deep chocolate flavor with that coffee kick is seriously addictive. Don’t be surprised if people start inviting themselves over or requesting this for every birthday/holiday/Tuesday.
Now go forth and bake! And remember, if anyone asks for the recipe, you can either be generous and share it… or claim it’s an old family secret that you’re taking to your grave. Your choice! Either way, you’re now officially the dessert whisperer.
Espresso Chocolate Cheesecake: Rich, Creamy & Coffee-Infused Dessert
Course: DessertCuisine: AmericanDifficulty: MediumServings
12
servingsPrep time
25
minutesCooking time
1
hourCalories
550
kcalTotal time
1
hour10
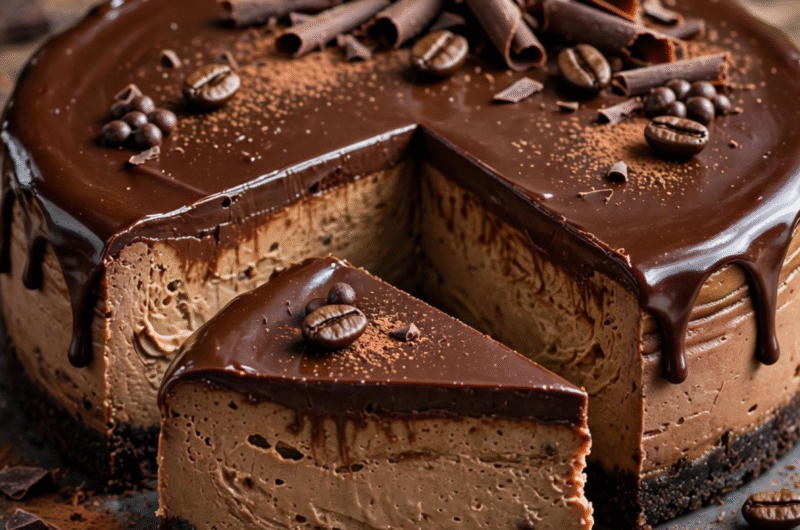
minutesEspresso Chocolate Cheesecake – rich, creamy, and infused with coffee flavor. A decadent dessert that’s perfect for special occasions or any coffee lover’s dream.
Ingredients
For the crust:
1½ cups chocolate cookie crumbs (Oreos with or without filling)
5 tbsp unsalted butter, melted
3 tbsp sugar
For the filling:
24 oz (680g) cream cheese, room temperature (essential!)
1 cup sugar
3 large eggs, room temperature
8 oz semi-sweet chocolate, melted
2 tbsp instant espresso powder
1 tbsp vanilla extract (real vanilla)
½ cup sour cream (full-fat)
For the topping:
1 cup heavy cream
2 tbsp sugar
Chocolate shavings (for garnish)
Directions
- Step 1 – Preheat
- Preheat oven to 325°F (165°C).
- Step 2 – Make the crust
- Mix cookie crumbs, melted butter, and sugar until combined. Press firmly into the bottom of a 9-inch springform pan (use the bottom of a measuring cup to pack it down). Bake for 10 minutes, then cool.
- Step 3 – Beat the filling
- Beat cream cheese and sugar until smooth and fluffy (no lumps!). Add eggs one at a time, beating well after each.
- Step 4 – Add coffee-chocolate
- Dissolve espresso powder in 1 tbsp hot water. Stir into melted chocolate. Add chocolate mixture, vanilla, and sour cream to cream cheese mixture. Beat until just combined (don’t overmix).
- Step 5 – Pour and bake
- Pour filling over crust. Tap pan gently to release air bubbles. Bake for 50-60 minutes until center is almost set but still slightly jiggly.
- Step 6 – Cool
- Turn off oven, crack the door open, and let cool for 1 hour. Then cool at room temperature for 1 hour. Refrigerate for at least 4 hours (preferably overnight).
- Step 7 – Top and serve
- Whip heavy cream and sugar until stiff peaks form. Top cheesecake with whipped cream and chocolate shavings. Slice with a hot, clean knife for perfect slices.
Notes
- Room temperature ingredients – Cold cream cheese/eggs = lumpy batter.
Don’t open the oven – Temperature changes cause cracks.
Don’t overmix – Overbeating = too much air = cracks.
Water bath optional – For extra crack prevention, wrap pan in foil and place in water bath.
Patience is key – Cheesecake needs time to set; don’t rush the chilling.